Friday 23 December 2011

Evergreen Plants

It's a good idea to incorporate a few evergreen plants into the garden to give a bit of winter greenery. There are plenty of evergreens to choose from and one of the best for green and gold colour is the Euonymus Fortunei 'Emerald and Gold'. This is easily grown in ordinary garden soil in sun or partial shade. I planted mine as a tiny shrub over 15 years ago and it has grown into a handsome 5ft tall specimen. It is a good choice for evergreen hedges as it withstands regular pruning to maintain shape. It may need some protection from extreme winter weather but will tolerate the average British winter.

Choisya Ternata (Mexican orange blossom) has glossy dark green leaves which are aromatic when crushed and produces sweetly scented white flowers in spring. I grow the golden leaved variety called 'Sundance' which brings a welcome bright splash of colour to the garden on dark winter days. Choisya has a wide spreading and rounded bushy habit and will grow to about 6ft tall and 6 - 8ft wide. It is pollution tolerant and therefore suitable for town gardens. Grow in any well drained garden soil in a sunny position. It will tolerate partial shade but the leaf colour is better in full sun. In very cold gardens it is best grown against a south facing wall as the foliage is prone to frost damage.

.A smaller pollution tolerant evergreen shrub which can be grown in containers or in the border is the Skimmia. These shrubs have oval green leaves and produce creamy white flowers in 2 inch long conical spikes which are followed by bright red berries which persist throughout the winter. As with holly bushes, you will need to plant male and female cultivars of this shrub close to each other in order for the female cultivar to produce berries. But a single shrub will produce flowers regardless. There is a red flowered male variety called 'Rubella' which is particularly attractive and this would be my choice. I am currently growing a variegated form of this shrub in a pot on the patio. The pot has been placed against the patio wall for protection as I am not sure if this variegated Skimmia will be as hardy as the other varieties, but it has a very pretty leaf edged in cream.

Friday 16 December 2011

Winter Flowering Viburnum

Viburnum bodnantense is one of the best frost resistant winter flowering shrubs. I have two of these, one in front of the house and the other at the bottom of the garden.
It is a deciduous shrub of upright habit which grows to about 8ft tall. The leaves are green oval shaped, the young leaves being tinged with bronze. Flowers are borne in 1 to 2 inch long clusters on the bare branches from December through to February. These open from rose red buds and gradually fade to pink, and then to white. As a bonus the flowers are also fragrant. When the sun catches them they look like little fairy lights adorning the branches.
This shrub grows well in any fertile moist garden soil and is best planted in full sun. It requires very little pruning. Just thin out overgrown shrubs by cutting the oldest stems back to the base after flowering (about April/May), and at the same time cut out any damaged or dead wood. 


Wednesday 30 November 2011

Planting in The Woodland Border

At the bottom of my garden is a raised border lined with trees and a few shrubs such as the winter flowering Viburnum 'bodnantense' and the spring flowering Choisya ternata 'sundance'. The soil tends to be rather dry here so I need to think carefully about what to plant. At the front of this miniature woodland border, trailing over the dry stone wall, I have planted aubrietia, arabis and saponaria which I wrote about in a previous post.
The border also has spring bulbs such as daffodils, bluebells and hyacinths together with spring flowering plants such as pulmonaria (lungwort) and primulas. There are also a few cyclamen hederifolium plants which were given to me by a former work colleague and are thriving under the trees.


Although cyclamen hederifolium originates in the Mediterranean region it is fully hardy in the temperate gardens of Britain. The leaves are a deep green with silvery markings and shaped rather like ivy leaves, hence the name 'hederifolium'. It is a low growing plant (approximately 4 inches in height) and bears shuttlecock shaped flowers in shades of pink. A white flowered form, 'album', is also available. The flowers appear from August to November, the leaves persisting longer throughout the winter and spring months. These plants do well in woodland conditions as they need shade from the hot sun and shelter from the winds. Another variety worth growing is the cyclamen coum which flowers in late winter/early spring. It is similar in appearance and flower colour but is smaller with more rounded leaves.
This autumn I have planted some anemone blanda rhizomes in the woodland border. This is another low growing plant from the Mediterranean region. It grows to about 6 inches high and produces pretty starry flowers in blue, white, pink and mauve. Flowering in spring just after the snowdrops have faded these plants are suitable for naturalising under trees. I just hope they are not as attractive to the squirrels as my crocuses were. I planted about 100 of these a couple of years ago and the squirrels thought Christmas had arrived early and promptly dug them all up! I'm keeping my fingers crossed that these will survive to make a good show in spring. 

Thursday 24 November 2011

Unusually Warm Autumn Weather

The unusually warm weather we have experienced this autumn has extended the flowering season of my annual plants. The white daisy flowers of the Marguerites in pots on the patio are as abundant as they were in midsummer. The Pelargoniums are also still producing flowers. Many perennials have had a second flush of flowers, including my lovely climbing rose, and this has combined with the reds and golds of the autumn leaves to produce a rich tapestry of colour not normally seen in the garden this late in the year.
Primulas which are normally spring flowering have also come into flower and the Camellia shrub is in bud. This is very unusual and I'm not too sure if it will flower as normal in the spring. The weather is changing now and temperatures are dropping. Leaf fall is increasing and I am expecting the first frosts soon.
I am definitely not complaining though when I think of the extreme winter weather we have suffered for the last two years. Hopefully this year the weather will follow a more normal winter pattern. I'm looking forward to the first frost as this is when I will sample my curly kale - it always tastes better once it's been exposed to frost. The kale plants and the leeks are growing really well and will hopefully provide me with fresh grown vegetables throughout the winter months. 

Wednesday 9 November 2011

Sweet Chestnuts - Food for Free

This is the season for sweet chestnuts - collect them now for an excellent wholesome free food which is high in fibre and full of vitamin C. The ripened nuts fall from the tree during October and November so get out in the woods and start collecting. Not to be confused with the inedible horse chestnut, the sweet chestnut husk has longer spines and contains two or three nuts. Stamp on the spiny green husks to split them and reveal the shiny brown nuts within.
You can eat them raw but be sure to remove the inner brown membrane as this can taste bitter. The shells and inner skins can be hard to remove but roasting them makes this job a lot easier and brings out the full flavour of the nuts.
When roasting chestnuts always slit the shells otherwise they will explode. The traditional way was to roast them in the hot ash of an open fire or close to the red coals, slitting the shells of all but one of them. When this one explodes you know the rest are ready. I wouldn't recommend this for an indoor fire as the explosion can be quite dramatic scattering shell shrapnel across the room. Perhaps this method is best left to outdoor fires.
If you don't have access to an open fire the chestnuts can be cooked in a conventional oven. First cut a slit in the shell on the flat side of each nut (very important to prevent exploding nuts!) Preheat your oven to 350 degrees C or Gas Mark 4 and place the nuts in a single layer in a baking dish. Bake for approximately 30 minutes. If you just want to heat them up to make them easier to peel rather than fully cook them, then just bake for about 15 minutes. Remove the shells and inner skins while still warm. If you leave them to cool they will be harder to peel.
Sweet chestnuts can be used in stuffing and to make puree. The nuts do not keep for long so if you want to store them for future use one method is to dry them in a very low oven until hard. Once dried store them in a dry jar in a cool dark cupboard. The dried chestnuts should keep for at least a year. To reconstitute the dried nuts put them into boiling water and cover. Leave them for an hour or so and then use them in your recipe. 

Monday 24 October 2011

Plant Garlic - It's so Easy to Grow

I love using garlic in cooking and it is really easy to grow your own. Heads of garlic for planting can be obtained from garden centres and mail order catalogues. You can get garlic for free by planting supermarket bulbs but the crop won't be as good. Split the garlic heads into individual cloves and plant these about 2 inches deep and 6 inches apart. Plant a bit deeper in light soils but if your soil if heavy and poorly drained you will need to plant about 1 inch deep on a bed of coarse sand and potting compost. Once planted just leave it to grow, weeding when necessary and watering in dry spells in spring and summer. You can plant the cloves in stages between now and February (depending on soil and weather conditions) which will give a harvest between June and August.
Lift when the leaves start to turn yellow and bend at the stem. Dry outside for about 7-10 days if the weather is fine and dry, otherwise dry in a well ventilated greenhouse. Store in hanging bunches or plaits so that air can circulate the bulbs.
If you don't have room in the garden to grow garlic, grow it in pots as it is shallow rooting and well suited to container growing.

Saturday 15 October 2011

Revamped Front Garden

Just finished smartening up the front garden and I'm very pleased with the result. This area was difficult to keep weed free and never really looked tidy, which is important in the front garden, so I decided to put down some weed suppressant material and cover it with green slate.
This will keep the ground weed free while letting the rainwater soak through.
It was quite hard physical work but I enjoyed it. First I needed to prepare the area by removing all plant material. Also there were bulbs planted in this area which I managed to locate by referring to previous photographs. These have been replanted in pots and borders in the rear garden. The ground was then raked and firmed by treading it flat.
I was lucky enough to get a roll of weed suppressant material in a local DIY sale. There was enough to cover the area with a fair bit left over. The green slate was purchased in 25 kilogram bags and it took 10 bags in total to cover all the material. The roses which were planted in the border along the fence have been pruned back and moved to the rear garden. I've replaced them with five lavender bushes - these were grown from cuttings which I took earlier this year. They should make a lovely fragrant low growing hedge to border my new garden. There are still some herbaceous perennial geraniums and sedum spectabile at the top of the garden near the wall and primulas have been planted in a narrow border along the path. Long stone troughs have been planted with violas and a couple of other pots contain small shrubs and bulbs to add a bit of interest.
I am so glad to have finished this before the winter. It was a job I had planned to do next spring but the weather has been so nice and unseasonably warm that it seemed a shame to waste the opportunity.

Thursday 29 September 2011

Forcing Bulbs for Indoor Display

Now is the time of year to think about buying prepared bulbs for early flowering indoors. Specially treated bulbs are available in garden centres. These are best for winter forcing as they will have been well grown, lifted at the right time and thoroughly dried to prevent disease or premature rooting. They will also have been stored at a carefully controlled temperature to induce proper development of the flower buds inside the bulb for flowering at the desired time.
Plant your bulbs in a correctly balanced compost such as John Innes No.2 or use bulb fibre which is cleaner and easier to handle. Both these growing mediums can be used in glazed bowls with no drainage holes. Place a layer of damp compost or moistened fibre in the bowl. Set the bulbs as close as possible. Fill the spaces with compost or fibre. The noses of large bulbs such as hyacinth, daffodil or tulip can be left exposed but cover all other bulbs completely. The surface of the compost or fibre should be well below the rim of the bowl.
Put the bowl in a cool, dark place. Check every couple of weeks that the bowl has not dried out. Well dampened compost or fibre should not need more than an occasional watering, if any, during this stage. When the tips of the leaves are showing 1-2 inches high, move the bowl to a greenhouse, conservatory or windowsill of a cool room (about 10 degrees Celsius). When the leaves have grown to 4 inches high, the bowl can be moved to a warmer room (about 18 degrees Celsius).  Taller flowers such as hyacinth, daffodil or tulip may need support - place a cane in the pot and tie the stems with string.
My favourite bulb for growing indoors is the hyacinth which has a beautiful rich fragrance when it flowers. It is available in a range of colours but my favourite is the blue flowered variety. I always plant the bulbs out in the garden when they have finished flowering. Plant to a depth of about 6 inches. Bulbs grown in compost will usually flower again the following year, whereas those grown in fibre often take a year to recover.
Start growing your prepared hyacinth bulbs now and they should be flowering in the New Year.

Sunday 18 September 2011

Growing and Propagating Strawberries

I have grown strawberries in the vegetable patch in previous years but have always had a problem with slugs, so this year I decided to grow some in a hessian sack on the patio as well as some in the veg patch. The plants were set into the sack through slits cut in the sides. I put a bamboo cane into the compost to drape an old net curtain over. This is to protect the fruits from birds once they start to ripen. The plants in the veg patch were protected in a similar way. Both the veg patch plants and the ones in the hessian container produced a good crop of fruits, although the ones on the patio were much better protected from slug damage. I will grow some more like this next year.
I grow Cambridge Favourite which is a mid season variety producing a heavy crop with a decent flavour in mid summer.
The best fruits are produced from younger plants and strawberry plants will usually need replacing when they have fruited for 2-3 years. The easiest and cheapest way to do this is by propagating the runners which are produced from June onwards. I just peg them down into loose soil and when they are well rooted detach them from the parent plant and grow them on in pots overwintered in the cold frame or greenhouse. Strawberries grow best in soil rich in humus so add some well rotted compost to your strawberry patch to ensure a good crop.
Another type of strawberry which is just as easy to grow is the Alpine Strawberry. This type does not produce runners so must be grown from seed. I have grown a variety called Baron Solemacher in the past which is a vigorous heavy cropper carrying the fruits higher on the plants, meaning less chance of slug damage. The fruits are much smaller but very aromatic and sweet, lovely in a dish with some ice cream. The alpine strawberries can self seed and be a bit invasive but are easy to control by simply weeding out any unwanted plants.

Tuesday 13 September 2011

Bumper Harvest

It has been a great year for my veg. I have frozen bags and bags of runner beans and carrots, pickled jars and jars of beetroot, stored a large sack of potatoes and the winter leeks and curly kale are growing strongly in the veg patch. Provided we don't get a repeat of the severe cold weather we experienced last year, the winter veg look like producing a good crop. I'm going to be well fed and healthy this winter!
The weather conditions this year have resulted in a bumper fruit harvest as well and, even though I do not grow any fruit trees myself, I have been lucky enough to have been given a lot of fruit. The plums I received were eaten very quickly, and very nice they were too. The apples and pears have been sliced, tossed in demerera sugar, topped with a crumble mix and put into foil containers in the freezer - more lovely food for the colder months.
I am seriously considering growing my own apple and pear trees but I haven't got a lot space in the garden for more trees. I am therefore looking at the possibility of growing them on dwarfing rootstock in pots or fan training them against the fence. 

Saturday 27 August 2011

Roses - a brief history

Roses have been around for thousands of years - they were painted on palace walls in Ancient Crete in 1600 BC and a thousand years later were portrayed on tombs in Egypt. The Greeks called roses the 'Queen of Flowers' and were the first to grow them in gardens and pots throughout the land. The Romans used them in food, wine, perfumes and medicine and are believed to have introduced them into Britain. In 1500 there were three types of roses grown in the Tudor garden - the red rose (Rosa Gallica), the white rose (Rosa Alba) and the fragrant Damask Rose. The globular and fragrant Centifolia or Cabbage Rose arrived from Europe in about 1550. This was followed by the Austrian Yellow which came to Britain from Persia via Vienna in 1580. The Musk Rose arrived around the same time from the Himalayas. These ancient garden roses only flowered once in a season, were limited in colour, globular in shape and spreading in habit.

The first China Roses arrived in Europe in the 18th century, followed many years later by the delicate oriental Tea Roses. Our modern roses evolved through the crossing of the repeat flowering China Roses and the beautiful flowered Tea Roses with our own frost hardy robust varieties. In the 1860s Rosa Multiflora was introduced from Japan. This wild rambler, with its small plain white flowers in large heads, became the parent of some of our ramblers and all of our floribundas.
For sheer beauty and variety roses are hard to beat. There are many different types of roses so everyone should be able to grow them, even if it is just a patio rose in a pot or window box. My father loved roses and grew mainly the hybrid tea variety. I prefer floribunda roses which mix nicely in the border with other flowering shrubs and perennials. One of my favourites is Iceberg which has lovely white flowers and is often used as a hedging rose. Another is Irish Wonder, a reliable prolific flowerer producing large trusses of beautiful red roses. Arthur Bell is a lovely fragrant yellow rose with large weather resistant flowers. It flowers early in the season and continues well into the autumn. Another very fragrant variety is Romance which grows taller than the others and produces large deep pink flowers. Summer just wouldn't feel right without roses in the garden and I can't imagine ever having a garden without them.

Sunday 21 August 2011

Lovely Home Grown Veg

The runner bean crop has been really good this year and I am busily picking beautiful long bean pods every day. Those that I cannot eat immediately will be frozen to give me a good supply of home grown veg in the coming months. Runner beans are easy to freeze - just prepare them as if you were going to cook them, plunge them into a pan of boiling water for a couple of minutes to blanch them, then drain and rinse them in cold water and bag them up for freezing.
The last of the potatoes were lifted today and stored in a hessian sack in the pantry. Even though the weather has been very dry during the growing season the crop has been pretty good and should last me a while.

The beetroot crop has also been good this year but it is usually a reliable crop. I always plant 'Boltardy' and it has never produced a poor crop yet no matter what the weather is like,
I boil up the smaller beets to eat with salad, cooking and pickling the larger ones to store and use throughout the winter months. I find that using a solution of roughly three parts Sarsons pickling vinegar to one part water produces the best results

Friday 12 August 2011

Hoverflies - excellent pest controllers

Has anyone else noticed how many more hoverflies than usual there are this year? Most plants in my garden seem to be surrounded by clouds of these insects. I'm not complaining though as they are definitely beneficial to the garden.
They are about 19mm long with black and yellow striped bodies (similar to wasps but smaller and non-stinging) and are capable of hovering and darting in any direction in helicopter fashion. This makes them interesting to watch.
The hoverflies themselves feed on nectar and swarms of them can be found round flowers in summer. Their larvae, however, are predators and feed on aphids. They provide an excellent biological control to aphid infestation.
I usually suffer infestations of greenfly on my roses and blackfly on the runner beans and have to spray regularly with soapy water to try and control them. This year, presumably due to the high proliferation of hoverflies, I have had no problem with blackfly and very few greenfly. I hope they will be as effective at controlling aphids in my garden next year.

Monday 18 July 2011

Summer Herbaceous Border

The herbaceous border is starting to fill out well, although there are still a few gaps where I need to improve the planting scheme. My favourite three plants for summer in the herbaceous border are the vibrant red Lychnis Chalcedonica, the pretty pink sweetly scented Phlox Paniculata and the classic white Chrysanthemum Maximum, better known as the Shasta Daisy.

Lychnis Chalcedonica, also known as Jerusalem Cross or Maltese Cross, was introduced into Britain in the 14th century and has always been linked with returning pilgrims. Although it was collected in the Middle East it actually originated in European Russia. The first part of the name comes from 'lychnos', the Greek word for lamp, and is thought to refer to the woolly leaves which were used as wicks for oil lamps. The second part of the name comes from 'Chalcedon' which is the classical name for Kadekoy, the district of Turkey opposite Istanbul. Flower heads composed of small bright red cross shaped flowers are borne on upright stems above the mid green leaves in early to midsummer. The plant grows to about 3 feet tall and will self seed freely. It likes moist but well drained fertile humus-rich soil and prefers a position in full sun or light dappled shade.

Phlox Paniculata is a lovely scented border plant which has flowers in varied shades from white through to pink, red, purple and blue, often with contrasting centres. The flowers appear throughout summer into autumn, and are long lasting when cut. I have three varieties in my garden at the moment and intend to plant more. They are a really good reliable hardy perennial with a long flowering season. The delicate fragrance is an added bonus. Grow them in any moist fertile soil, positioning them in full sun or partial shade. This welcome addition to the herbaceous border was introduced into Britain in 1730 from the Eastern United States.

The perennial Chrysanthemum Maximum, also known as the Shasta Daisy, is one of my favourite plants. The lovely white daisy flowers are up to 3 inches across with a golden eye and make a cheerful display from June to August. There are varieties available with semi double or double flowers but I think the single flowered variety is the most beautiful. It grows to between 24 and 36 inches in height and likes a sunny position in a well drained fertile soil. Propagate by taking 2 - 3 inch long cuttings of basal shoots in March/April or by lifting and dividing established clumps, again in March/April.

Friday 15 July 2011

Harvesting the first Potatoes

. The veg patch is looking good at the moment. The runner beans have their beautiful scarlet flowers and have not been too troubled with blackfly this year. The beetroot is looking healthy and I have just planted twenty winter leeks and ten curly kale plants. Hopefully these will give me some lovely fresh veg this winter provided we do not get such severe weather as last winter. The last of the strawberries have been picked and eaten and I have now turned my attention to the potato crop. Today I lifted the first of my new potatoes. I have been a bit concerned about them as the weather has been so dry, but the first two haulms have been lifted and they look like they have produced a reasonable crop. I will be cooking the first of these potatoes for lunch tomorrow and intend to serve them with a chicken casserole and some sweetheart cabbage. Mmmm - can't wait!

Monday 4 July 2011

Lilies

I grow two types of lilies in my garden - small Asiatic Hybrid lilies which only grow to about 15 - 18 inches tall and are therefore suitable for growing in pots, and a species lily called Lilium Pyrenaicum which was given to me by a friend. The Asiatic Hybrids have beautiful large trumpet flowers of varied colours and are the ones which are widely available in garden centres. The species lily, Lilium Pyrenaicum, which is pictured left has much smaller bright yellow flowers with curved petals and long orange stamens. It is not as flamboyant as the Asiatic Hybrids but is much more of a traditional cottage garden plant and grows to about 24 - 28 inches in height.
My lilies flower from May to June and have just finished. The bulbs in the pots will increase and become pot bound eventually and I then transplant them to a sunny spot in the garden.
Lilies thrive in sun or partial shade and should be planted between October and March. The Asiatic Hybrid lilies are stem rooting. This means they produce roots from just above the bulb as well as from beneath it. These require deeper planting than those that just root from the base of the bulb. A good rough guide is to plant at a depth of two and a half times the height of the bulb. Young lily bulbs have contractile roots and can pull themselves down to the correct depth if planted a bit too shallowly. If planting in pots use a good soil based compost such as John Innes No.1.
One word of warning - watch out for the bright red lily beetle. The larvae can cause severe damage to your plants. They also cover themselves in a black slimy excrement which looks horrible. Luckily the beetles are very easily spotted being such a bright red colour. Just pick them off and squash them. You need to be vigilant and check your plants regularly. I find they seem to be more active in the evening. There are chemicals which can be used to control this pest but I don't like using strong chemicals in the garden where they could have a detrimental effect on other beneficial insects such as bees. Anyway it's much easier and cheaper to just remove the beetles by hand and kill them.   

Thursday 16 June 2011

Avoiding Carrot Root Fly

Growing your own carrots is easy and rewarding - nothing beats the sweet taste of freshly lifted young carrots. There are many varieties of all shapes and sizes and all are easy to grow. I grow the 'Early Nantes' variety which is a slender finger length carrot.
The only problem you are likely to encounter is the carrot root fly. The adult flies first lay their eggs in May/June and then lay a second batch in July/August. The eggs hatch to produce small maggots which tunnel into the roots. The adult fly is attracted to the carrots by the smell released from fresh leaves so it is best if you handle the leaves as little as possible. It helps if you don't sow the carrots too thickly so there are fewer seedlings to thin out. 
One way of deterring the adult fly without using chemicals is by interspersing rows of carrots with rows of onions. The smell of the onions allegedly disguises the smell of the carrot leaves. I haven't tried this method as I have limited space to grow root crops in my vegetable patch. So I decided to try a different method. I saw a television programme which featured someone who had previously suffered a lot of problems with carrot root fly and who found a simple chemical free solution. Evidently the flies will fly at a certain height and this person solved the problem by growing their carrots in a barrel about 3 feet tall, above the height at which the adult carrot fly travels.
I have managed to get hold of an old 45 gallon plastic drum which I have filled with soil and planted with carrots. I tried this for the first time last year and had a reasonable crop so I hope to repeat that success this year.

Friday 10 June 2011

Conserving Water in the Garden

This has been an unusually dry spring and some parts of the country are officially in drought. We all need to think about how we are using water and gardeners can make a real difference by using water wisely. Collecting rainwater is the easiest way to conserve water use in your garden. If you have a water meter it can also save you money. Proprietary rainwater diversion kits, together with rainwater storage butts, can be purchased from most DIY outlets but all sorts of containers can be utilised by the innovative gardener.
I installed my first rainwater butt (pictured) at the rear of the garage a number of years ago. Since then I have installed two others at the front and rear of the house, and two smaller containers collect rainwater runoff from the greenhouse. It's surprising how much water you can save with just a few storage barrels.
Another good way of preventing your garden from drying out excessively is by mulching your borders to reduce water loss, and by adding plenty of humus to your soil, especially if it is very free draining. Home made compost is excellent for this job and it's free, saving you even more money.
If you want to be more creative get advice from a plumber regarding a 'grey' water system. Grey water is what comes out of washing machines, washbasins, showers and baths. It may contain soap and detergent but this can mostly be removed by suitable filters. The objective is to pump this water to a special storage tank where it can then be reused for flushing toilets, washing the car and watering the garden. It's a great idea for water conservation but a bit of an expensive investment for the average gardener.

Monday 6 June 2011

Oriental Poppies

June is the month that my Oriental Poppy (Papaver Orientale) comes into flower. Oriental Poppies are really spectacular when in flower, the bright scarlet flowers being about 4 inches in diameter.
This is a hardy spreading border perennial which grows to about 2-3 feet tall. There are a number of garden varieties with flower colours ranging from white through to pink and blood red. My plant is a beautiful scarlet red. It's a shame the flowers don't last longer. By the end of June they will all be gone. As the foliage is rather untidy I prefer to cut it back once flowering has finished. Sometimes if the weather is mild enough they will produce a second flush of flowers in the autumn.
Oriental Poppies are happy in ordinary well drained garden soil but need a sunny position. Plant them out in March/April or October. Established plants can be propagated by dividing and replanting the roots in March or April.  

Wednesday 1 June 2011

Growing Tomatoes using the Ring Culture Method

Each year I like to grow a few tomatoes. My favourite variety is 'Gardener's Delight' which produces lots of small sweet fruits. This variety can be grown outside as a bush plant but the weather in this part of the country is not really good enough to ensure a decent crop. So I prefer to raise my tomatoes in the greenhouse. Tomatoes are easy to grow under glass, whether grown in the soil border or in growbags or pots. If you use the soil border to grow your tomatoes the soil will need changing after 2-3 years. If you use pots then a richer soil based compost such as John Innes No.3 is required.                   My greenhouse has a solid floor and I don't really like using growbags so I have been using the ring culture method for a number of years and find this gives excellent results. This simple system uses 12 inch diameter bottomless pots (also called rings) which stand on an isolated bed of aggregate such as gravel, crushed stone or pebbles. My aggregate bed is a frame constructed of 6 inch deep wooden planks lined with plastic sheet and filled with small pebbles. Plastic 12 inch diameter rings are placed on the aggregate bed spaced 18 inches apart. These are filled with John Innes No. 3 compost and a bamboo cane is inserted into each ring to train the tomato plants up. After planting water in well and leave for a few days for the plants to root through the compost into the aggregate. Continue to water the compost sparingly for a few weeks followed by watering the aggregate regularly. Once the first couple of flower trusses have set and the fruits have started to swell, a proprietary tomato feed can be watered into the compost on a fortnightly basis. When growing tomatoes up canes or wires as a cordon, make sure any side shoots are removed so the plant's energy is concentrated in the production of the fruits.

Thursday 26 May 2011

Perennial Geraniums


These are hardy perennial plants and should not be confused with the bedding and pot varieties whose correct botanical name is pelargonium.
Herbaceous perennial geraniums (also known as Crane's-bill) are varied in stature and habit. Some are suitable for herbaceous borders or ground cover and others are more suited to rock gardens.
I grow three of the taller geraniums which grow to approximately 18 - 24 inches tall. I have one  maroon, one blue and one white flowered plant. All are attractive to bees but the maroon flowered plant attracts more than the other two. This is a bonus as I didn't realise when I planted them how attractive they would be to the bees.

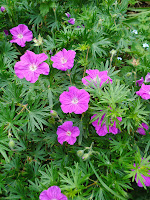
I also grow Geranium sanguineum (commonly known as bloody Crane's-bill) at the front of the border. This has larger bright magenta flowers and only grows to about 6 - 9 inches tall, but spreads to 18 inches making it a good ground cover plant. Geraniums grow in any ordinary well drained garden soil and will thrive in sun or partial shade. As with most perennials they can be propagated by dividing the plants and replanting them between September and March. Some of the taller varieties may need some support, especially in exposed sites.  

Wednesday 18 May 2011

Herbs in Pots

Growing fresh herbs for culinary use is a very satisfying part of gardening. My herbs are grown in individual pots rather than in the main borders. One advantage of this is being able to move the pots into a frost free greenhouse in winter if I want to grow less hardy varieties. The pots can also be placed close to the house so the herbs are handy for the kitchen. At the moment I am growing Mint, Oregano, Thyme, Lemon Balm, Golden Marjoram and Chives in 12 inch pots, with Rosemary, Sage and Hyssop planted in larger containers. All of the above are perennial and hardy. It is worth growing some of the annual herbs as well if you use them regularly.


Last year I visited a herb garden close to where I live. They have a wonderful selection of herbs for sale and I bought a hyssop which has aniseed flavoured leaves. It also has beautiful purple/blue flowers. Planted in a large tub on the patio it is very attractive when in flower with very tasty leaves which I like to chew while pottering around the garden.
Even if you don't use herbs in your cooking they are still worth growing for their scented foliage and often pretty flowers. Some are used in pot pourri and others have medicinal qualities. For anyone interested in herbs and their uses I would recommend reading Culpeper's Complete Herbal & English Physician, a beautifully illustrated book which gives a fascinating insight into the properties and uses of herbs.

Friday 13 May 2011

Zephirine Drouhin - The Thornless Rose

One of my favourite roses is Zephirine Drouhin, a Bourbon climbing rose. This is an old variety introduced in 1898. It grows to about 9 feet tall and I have it trained up a trellis on the rear wall of the garage. This is a reasonably sheltered but sunny spot and I have underplanted the rose with a Clematis.
The flowers of Zephirine Drouhin are a beautiful deep pink and have a very rich fragrance. The Clematis planted with it is the large single flowered variety 'Niobe' which has dramatic dark red flowers providing a good contrast to the pink roses.
Zephirine Drouhin has thornless stems and is repeat flowering. It can be grown as a climber or kept pruned to be grown as a bush or a hedge. Removing the dead flower heads regularly ensures a succession of blooms from June onwards. My climber has already started to flower in the warm May weather. Very little pruning is required if grown as a climber: just take out any dead wood and remove withered shoot tips. As this rose has thornless stems it is ideal for growing over a rose arch where the wonderful scent can be fully appreciated. This is what I intend to do with my next Zephirine Drouhin.

Monday 9 May 2011

Trailing Plants over Dry Walls

I love to see flowering plants trailing over dry stone walls. There are a variety of plants suitable for this situation but the three plants I have trailing over my dry stone wall are Arabis, Aubrieta and Saponaria. All three are flowering at the moment.

Arabis caucasica is a perennial which grows to 9 inches high and spreads to about 24 inches. It has grey/green leaves and pure white flowers are produced from February until June. It can be a bit invasive as it is fast growing, so give it a bit of space to spread. The grey/green foliage is attractive even after the flowers are done. It prefers a well drained soil in partial shade. Cut back hard after flowering has finished and propagate by lifting and dividing established plants in September. Arabis caucasica was introduced into Britain from Southern Europe in 1798.

.Aubrieta deltoidea is a mat forming perennial plant growing about 4 inches high and spreading about 18-24 inches. There are several varieties in varying shades of red, lilac and purple. They are all attractive colours but I prefer the purple which is a particularly vibrant colour. Aubrietas look stunning trailing over dry stone walls and flower profusely between March and June. Lightly trim the flowering stems when the flowers have finished. No other pruning  is required. They can be propagated by dividing and replanting in September. A well drained soil and sunny position is preferred.
 The Aubrieta was discovered by a botanical expedition sent by the French King Louis XIV. The botanical artist Claude Aubriet was part of the expedition and the plant was named after him. It is native to mountain regions from Sicily to Iran.

Saponaria ocymoides is a vigorous prostrate perennial which produces bright pink flowers from early summer. It will grow in any fertile garden soil in sun or partial shade. Like Arabis and Aubrieta it can be propagated by dividing and replanting established plants in the autumn. Another variety of Saponaria is the upright perennial Saponaria officinalis, also known as Soapwort, which has red, pink or white flowers and can grow to 3 feet tall. It is known as Soapwort due to its soapy qualities. If the leaves of this plant are swirled around in water a considerable lather can be achieved. The Romans used the suds as a water softener. It is believed that the Soapwort was originally collected by Crusaders in the 13th century when they were travelling home across the mountains of south west Asia and Europe. As recently as the 20th century its properties of cleansing softness were a recognised part of the treatment and conservation of old and precious tapestries.

Thursday 5 May 2011

Aquilegias

A very easy to grow plant which self seeds readily, the Aquilegia Vulgaris ( also known as Granny's Bonnet) is a lovely cottage garden plant which has flowers of many hues. The plants increase each year if you let them set seed and the flowers, which appear in April/May, vary from white and pink shades through to reds, pale and dark blues, mauve and purple.
This can be a bit of an invasive self seeder, much like the forget-me-not. But the flowers, like the forget-me-not, are very pretty so I just weed out any unwanted plants. Letting the plants set seed results in many different colours as the varieties inter-hybridise easily and do not grow true to type. Cut back stems immediately after flowering if you wish to prevent self seeding. Aquilegias can be propagated by dividing the roots between October and March. This is one way of ensuring that you increase the stock of a particular colour. My favourite colour is the blue which is particularly lovely. These plants will grow to a height of about 12 - 18 inches and prefer a moist but well drained soil in either a sunny or partially shaded position.

Sunday 1 May 2011

Lavender Cuttings

Every garden should have at least one lavender plant as they are easy to grow in any well drained garden soil and have a wonderful scent. I have grown a few different varieties of lavender but my favourite is the Old English Lavender which grows to a height and spread of about 36 inches. The foliage is silver grey and the highly scented flowers are a pale lavender blue. It is very popular with the bees as well which is another good reason to grow it.
According to my plant reference book cuttings of lavender should be taken in August or September but I always take my cuttings around April time. I take 3 to 4 inch long cuttings from the new soft growth on the tips of the branches. The ends are dipped in hormone rooting powder and the cuttings inserted into 3 inch pots filled with ordinary multi purpose compost. The pots are kept moist but not too wet and put into a sheltered place such as the cold frame or greenhouse. I always take more cuttings than I need to allow for failures. Extra plants can be given as presents to family and friends.
My original Old English Lavender was a cutting off a plant belonging to my mother. This was given to me 30 years ago and my present plants are descendants of that original plant.
I also grow the smaller 'Hidcote' variety in pots. These have darker purple blue flowers which are also very fragrant.  I also grew two french lavender plants but unfortunately they proved to be less hardy than their english counterparts and did not survive last winter's severe cold weather.
Lavender flowers can be dried to use in herb sachets or pot pourri. Cut the long flowering stems when the flower buds are plump but before they have opened. Tie the stems together and hang up in a dry place. Alternatively lay them on a wire rack in the airing cupboard if you have the space. When the flowers are completely dried you can remove them from the stems. Don't throw the stems away but burn them on an open fire where they will produce a lovely fragrance.

Wednesday 27 April 2011

Spectacular Spring Flowers

The lovely warm weather has resulted in a  spectacular display of spring flowers and blossom in the garden. On my weeping cherry tree (Prunus 'Kiku-shidare Sakura') the gracefully drooping branches were weighed down by beautiful double pink flowers during the first half of April. At the same time my evergreen Camellia produced its lovely dark pink flowers. I was worried that the Camellia may have had its flower buds damaged by frost and would not flower well this year, but it proved me wrong with a wonderful display.
Just as the cherry blossom and camellia flowers were fading, my dwarf rhododendron 'Scarlet Wonder' burst into colour with the whole plant covered in gorgeous deep red flowers. This is one plant which certainly lives up to its name! I grow it in a large glazed pot using ericaceous compost as it prefers acid soil.  My garden soil is fairly neutral but not acid and the camellia seems to be thriving here even though they normally favour a more acid soil. I have planted it in the shelter of more mature shrubs to protect it from cold winds.  

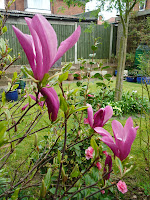
Another spring favourite is the Magnolia x Soulangiana 'Susan' which produces pink-purple flowers 3-4 inches across in April. Unfortunately, like the camellia and cherry tree, the flowers are quite short-lived. But it is still worth growing all these plants for the sheer beauty of their flowers.

If you are in Cumbria it is well worth paying a visit to Muncaster Castle to see the amazing display of all kinds of rhododendrons and azaleas lining the quarter mile driveway leading to the castle. There is also a wonderful display of spring flowering magnolias, cherries, pieris and rhododendrons on the inner side of the castle's terraced walk.

Tuesday 12 April 2011

Gardening in Madeira

I have just returned from a holiday on the beautiful island of Madeira which is an interesting place for anyone who loves gardens and gardening.
There are lovely parks and botanical gardens to visit but the gardens I found most fascinating were the private gardens of houses built on the steep hillsides and mountainsides of this volcanic island. These mainly small gardens are steeply terraced and every inch of the land is put to good use. It is certainly a lot more challenging than gardening in England but they do have the advantage with the climate. A lot of the gardens are used to grow food but areas near to the house often have beautiful displays of flowers.
Flowers seem to be everywhere you look on this island. Azaleas in a riot of different colours hang over walls and steep embankments. Nasturtiums tumble wildly down the hillsides and the lovely Bird of Paradise flower (pictured above) grows everywhere, in gardens and along the roadside verges. Water is transported from the wetter west and northwest of the island to the drier southeast by way of irrigation channels called levadas. Levada walks are very popular with visitors.
I would love to go there again at a different time of the year to see the gardens in full flower.

Tuesday 22 March 2011

Making Lovely Garden Compost

I love to make garden compost. It's a wonderful way of recycling  garden waste and putting nutrients back into the soil. It's a simple process provided you follow a few simple rules. First you need to make a compost heap. This can be just a free standing heap but it is usually better, and tidier, to have a compost bin. My first attempt at a compost bin was a container purchased from a gardening magazine which consisted of a metal frame with a rather flimsy plastic cover. This did not last for long and I then purchased a rigid plastic bin with a lid. This was rather like a bottomless dustbin with air vents in the sides. It looked a bit like a Dalek! Although it was large enough to take plenty of garden waste, it was difficult to turn and mix the contents. Also as it was completely covered it needed water adding regularly to keep the contents moist. It seemed to take a long time for the waste to rot down and produce a good usable compost so last year I decided to get rid of the plastic bin and build a timber compost bin. Using some old fence posts and wooden pallets I constructed a nice bin about 1.5 metres long by 1 metre wide and 1 metre high. This has performed much better and I already have some well rotted compost at the bottom of the bin which can be used to enrich the vegetable patch and top dress the flower borders. When starting a compost heap put some coarser material in a layer at the bottom of the bin. Not too woody plant stems or hedge clippings would be ideal. Then add layers of garden waste such as annual weeds, tops of perennial weeds, dead leaves, prunings and grass cuttings. Try not to have a large concentration of one type of material but mix it well. Water the heap if it is dry but not too much. It needs to be nicely damp, not soggy. To keep the heat in you can cover it with an old piece of carpet or tarpaulin. Heat and moisture and a good mix of ingredients are all you need to produce good compost. Air is also important as composting is an aerobic process. The easiest way to introduce air is by turning the heap. Any container should have adequate ventilation to allow air to flow through.
You can add kitchen scraps to the heap but never put cooked food, meat or dairy products onto it as these can attract vermin. Also avoid using any plant material which is diseased, any weeds with seed heads, perennial weed roots or animal waste.

Saturday 19 March 2011

New Season Veg Patch

The last of the Leeks have now been lifted and the veg patch is being dug over ready for the new planting season. The first crop to go in this week will be the 'first early' potatoes. The variety I am growing this year is Arran Pilot which I have grown before. It is a good tasty potato which stores well.
Once the potatoes have been planted I will set up the bamboo canes in a wigwam formation ready for the runner beans. These will not be planted for at least a couple of months until the risk of frost is past. I like to mark out the areas where different crops are to be sown. Each year the type of crop is rotated to a different part of the veg patch to minimise the risk of disease building up in the soil. This method seems to be working well.
Lots of home made garden compost is dug into the veg patch each year to replenish the nutrients in the soil and this has resulted in a great improvement to the quality of the soil. I don't use any artificial fertilizers or any chemicals on my food crops. All my home grown veg is grown organically.

Cold Weather Casualties

There have been a few casualties of the extremely cold weather this year. The main loss is my evergreen Hebe shrub which had masses of white flowers throughout the summer, often flowering again during autumn and even into winter if the weather remained mild. I'm not sure of the exact variety of this Hebe as it was given to me by a friend many years ago. It is a shame to lose this shrub as it attracted lots of bees but I have decided to replace it with a couple of white flowered floribunda roses. I already have two 'Iceberg' floribunda roses in the front garden but, as they have never seemed to really thrive there, I will be moving them to the rear garden in place of the Hebe.
Other evergreen plants, such as the variegated Euonymous shrub, Holly bush and the Bay Tree, have also suffered with their outer leaves turning brown. At least they have survived and, with a bit of careful pruning, should recover their good looks. 

Wednesday 23 February 2011

Daffodils

The weather is getting milder and the first of the spring bulbs in my front garden are coming into flower. The main spring bulb in the front garden is the daffodil (Narcissus). Most of the daffodils I grow are varieties of the smaller Cyclamineus Narcissus, which I find grow better in my garden than the larger trumpet daffodils. The bulbs multiply each year if left undisturbed and eventually make large clumps which can be divided once the leaves have died down.
These smaller daffodils are ideal for growing in pots which can be used to fill gaps in the borders. Make sure the pots have good drainage otherwise the bulb roots may rot. Use a soil based compost which will retain moisture for longer and plant the bulbs as deeply as you would in the garden border.
If you want to lift your bulbs after flowering has finished to make room for other plants, a good idea is to plant them in a lattice basket (the type used for pond planting) and bury this container in the soil. When flowering is finished lift the container and replant elsewhere as they need to remain buried while the bulb is still active. Once all the leaves have turned yellow the bulbs can be lifted, dried off and stored until replanting in the autumn. This is also a useful way of keeping track of your bulbs.
The varieties of small daffodils I grow are 'Jetfire' which has yellow outer petals and a bright orange trumpet; and Tete-a-Tete which has yellow outer petals and a golden trumpet. This is a vigorous variety which has up to three flowers per stem.
One larger variety of daffodil which I like to grow, and which does well in my soil, is 'Cheerfulness' which has a sweetly scented double white flower. If you can grow the larger later flowering yellow trumpet daffodils, try planting them behind clumps of blue aubretia. The blue and yellow look particularly lovely together.

Wednesday 16 February 2011

Save Our Bees

There has been a lot of discussion lately about the decline in our bee population. This is a serious issue as bees don't just produce honey. By pollinating plants they are responsible for a third of the food we eat.
Various theories have been put forward regarding the cause of bee colonies dying, one of these being the rise of monoculture where large swathes of land are given over to single crops. The theory being that, like humans, bees need a varied diet to stay healthy. This is where gardeners can really make a difference by planting lots of nectar producing flowering plants which flower throughout the year. These could include crocuses, pulmonaria and fruit trees in spring, delphiniums, roses, lupins and flowering herbs such as rosemary, thyme and lavender in summer, and later flowering perennials such as salvia in the autumn.
Another way to help the bees is to provide suitable habitats. There are 3 general types of bee in Britain - honeybees, bumblebees and solitary bees. Honeybees live in manmade hives containing up to 70,000. Bumblebees are also social creatures, living in cavities in the ground containing around 300. The solitary bee usually lives in pairs in narrow holes in walls and in decaying wood. A dry stone wall at the bottom of my garden provides a good habitat for solitary bees and I once had a bumblebee nest in the side of a compost bin.
The use of pesticides can also have a negative impact, not just on the bees but on other beneficial insects. It is best to limit the use of these products, or better still stop using them altogether. Use soapy water for aphids and pick caterpillars and lily beetles off by hand. Plant native plants to encourage beneficial insects such as hoverflies which feed on aphids, a natural method of pest control. Increasing insect life in your garden also attracts other wildlife such as birds.
 

Saturday 12 February 2011

Primroses and Polyantha

I have just planted some primroses in the front garden. I love the native primrose, Primula vulgaris, a compact plant which grows to about 6 inches in height and produces lots of small pale yellow flowers with darker yellow centres. This native primrose grows more robustly in my garden than the hybrid Polyanthus and each year spreads a little bit more.

The Polyanthus is a garden hybrid which is very popular for bedding and containers due to its beautiful and varied colour palette. The flowers are larger than the Primula vulgaris and are carried in large trusses on stout stems well above the leaves. If you want dramatic early spring colour then these plants are hard to beat. Some of the colours are so delicate the flowers look as if they have been hand painted. I can never resist buying a few each year. They are perennial plants and will flower again next year.  

Friday 11 February 2011

My Lilac Tree is Saved

In December last year I wrote about my lovely old lilac tree which was brought down by the heavy snowfall. I have been cutting back and clearing the trunk which had split and fallen. Part of the trunk is still in the ground and there is new growth so it looks as if the tree will grow again from the base after cutting back. I am really pleased that the tree is not a complete write-off. It will be a while before I have all those beautiful scented lilac flowers covering the front garden every springtime, but I am sure they will be worth waiting for.
Meanwhile I need to tidy up, repair the damage to other shrubs and plants and replant to fill any gaps. There are quite a few bulbs coming through - dwarf daffodils and tiny blue irises. I would love to grow crocus bulbs but the squirrels love them and soon dig up any that I have planted. I don't mind too much though as I love to watch the squirrels in my garden.    

Wednesday 2 February 2011

Winter Flowering Jasmine

The winter flowering jasmine (Jasmine Nudiflorum) flowers on the bare wood between November and April. It is a climbing plant which needs the support of a trellis or pergola. I grow mine on the front wall of the house in a recess under the bay. This is a perfect spot as it is sheltered from cold winds.
I planted it in a large wooden barrel and trained it up a trellis. As it is in the shelter of the bay it does not benefit from rainfall and needs regular watering. Unfortunately I can be a bit forgetful when it comes to watering but it seems to thrive on neglect and, even though we had an extremely bad winter this year, has produced a lovely show of yellow flowers (the above photo was taken yesterday).
This is a good climber for a north facing or shady spot as it is hardy and flowers well even in shade. It can be a bit susceptible to cold winds though, so don't plant it in a very cold exposed position. Trained against a wall is ideal.
This climber needs pruning immediately after flowering by cutting all the flowered shoots back to 2-3 buds from the main stem. This is also a good time to cut out any old dead wood to keep the plant neat and tidy.

Friday 28 January 2011

Snowdrops - A Winter Favourite

These beautiful flowering bulbs were introduced into this country in the 16th Century from the eastern Mediterranean. The first species were called Galanthus nivalis. The word Galanthus is derived from the Greek - 'gala' meaning milk and 'anthos' meaning flower. So the original name was actually the milkflower. The Latin 'nivalis' means growing near snow. There is also a Christian legend which tells of an angel who was helping Eve after her fall from Paradise, when it snowed. The angel caught a snowflake and breathed life into it, and the snowflake fell to earth as the first snowdrop.
These frail looking, but extremely tough little plants fascinate me. There are now many different varieties of single and double flowered snowdrops and they are relatively easy to grow. It is best to buy your snowdrops 'in the green' which means they have been damp packed and are available to buy as the flowering season finishes. The survival rate of these bulbs is much greater than dry bulbs bought in summer. Dried out bulbs transplant badly so if you do buy snowdrops make sure you plant them straight away.
They prefer a moist soil and light shade so are perfect for naturalising in grass under trees or in open woodland. You can increase your stock of snowdrops by lifting and dividing the larger clumps while the leaves are still green after flowering.
There are some wonderful displays of snowdrops in gardens open to the public. My favourite place to visit is Hodsock Priory in Nottinghamshire which has a wonderful display of snowdrops and other early flowering plants. Take a look by clicking on this link  http://www.hodsockpriory.com/snowdrops